** Sayfayı Safari İnternet Tarayıcısı ile Açınız ** Iphone ve Ipad uygulamalarında bağlantı ayarları benzer şekilde yapılır. Linke tıklayarak config dosyasını indirin ve açıklamaları takip ederek bağlantınızı ayarlayın.
** Open the page with the Safari browser** Connection settings are similar in Iphone and Ipad. Download config file and customize your eduroam settings.
1. Öncelikle dosyayı indirmek için yukarıdaki linke tıklayın. (Firstly, click the link to download the file above.)
2. Yapılandırma profilinin indirilmesine izin verin. (Allow the configuration profile to load.)

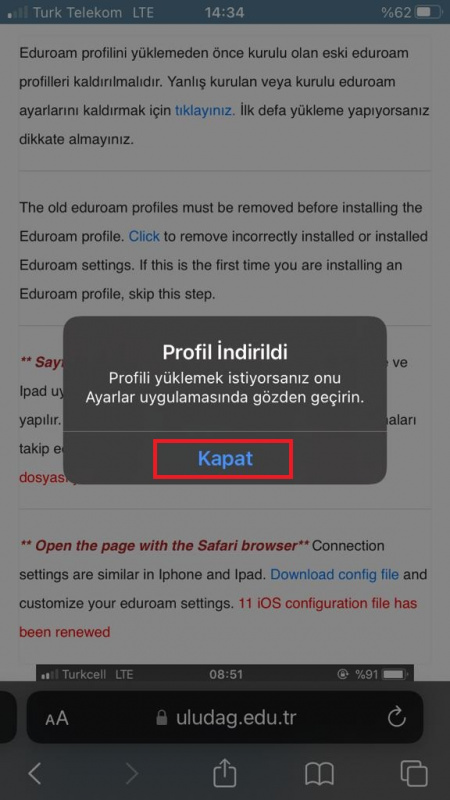
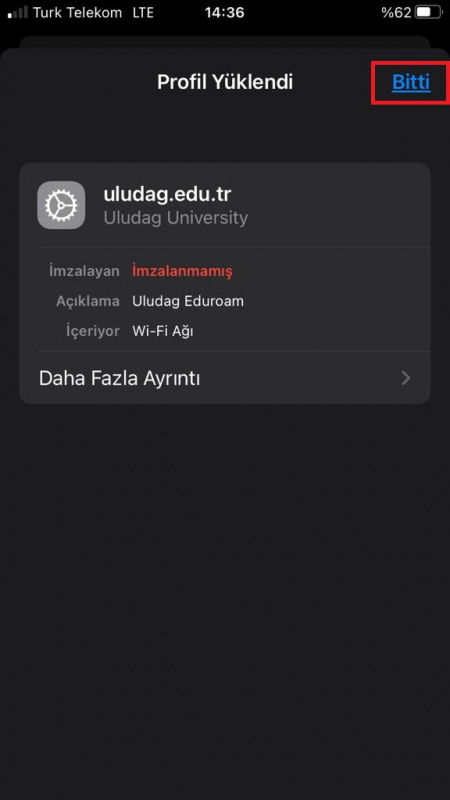
3. Profil indirildikten sonra “Kapat” a basın.(After downloading, click the “Close” button.)


4. İndirilen profili “Ayarlar” dan görebilirsiniz.( You can see downloaded profile file in the “Settings” tab.)
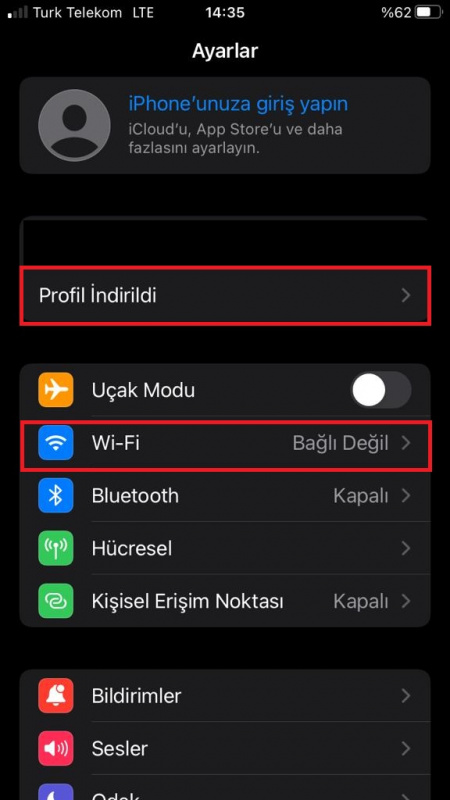
5. “Profil indirildi” göründükten sonra üzerine basarak “Profil Yükle” üzerinden devam edin. (After “Profile has been downloaded” appears, press on it and continue with “Install Profile”.)

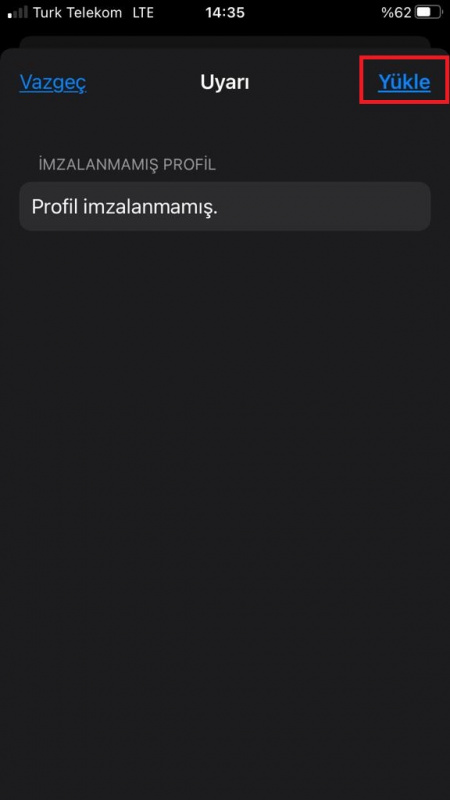
6. Tekrar “Yükle” butonuna basın.(Click the “Install” button again.)
7. Bu aşamadan sonra telefonun iOS versiyonuna göre yapılacak ayarlar değişiklik göstermektedir. Aşağıdaki ekran görüntüsünün gelmediği durumlarda sizden Kullanıcı Adı ve Şifre isteyen iki seçenek çıkacaktır. Bu durumda Kullanıcı Adı olarak okul e-postanızı(*******@ogr.uludag.edu.tr) ve Şifre olarak(E-posta veya Otomasyon şifresi) girerek 14.adıma geçin. Aksi takdirde, sıra ile işlemlere devam edin. (After this stage, the settings to be made vary depending on the iOS version of the phone. In cases where the screenshot below does not appear, two options will appear asking for Username and Password. In this case, enter your school e-mail (*******@ogr.uludag.edu.tr) as the User Name and (E-mail or Unisis password) as the Password and proceed to step 14. Otherwise, continue the steps in order.)
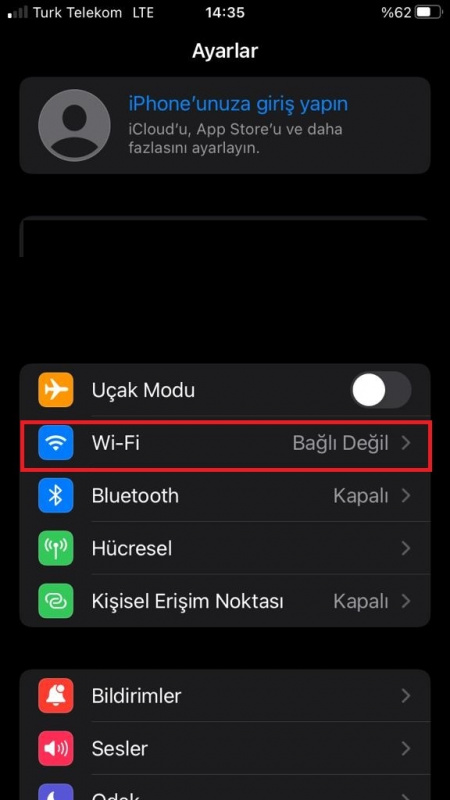
8. Tekrar “Ayarlar” kısmına dönerek “Wi-Fi” basın.(return again “Settings” tab. Click “Wi-Fi” button)
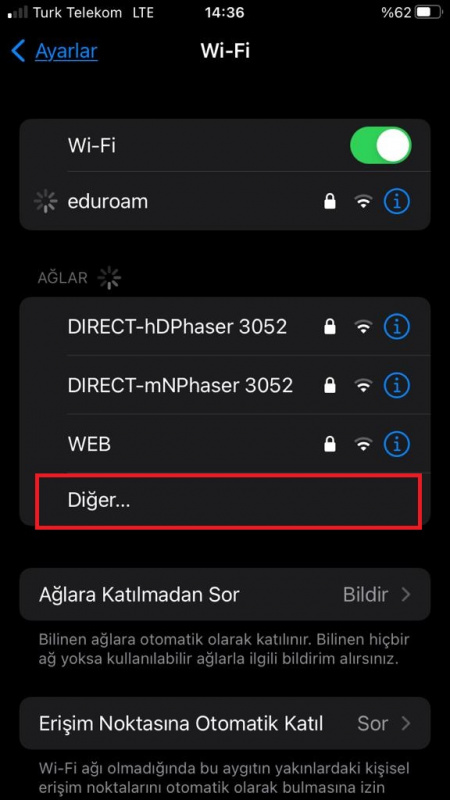
9. Önceki adımlarda Kullanıcı Adı ve Şifre sorulmadığı için “Diğer” butonuna basılır.( Since User Name and Password are not asked in the previous steps, the "Other" button is pressed.)
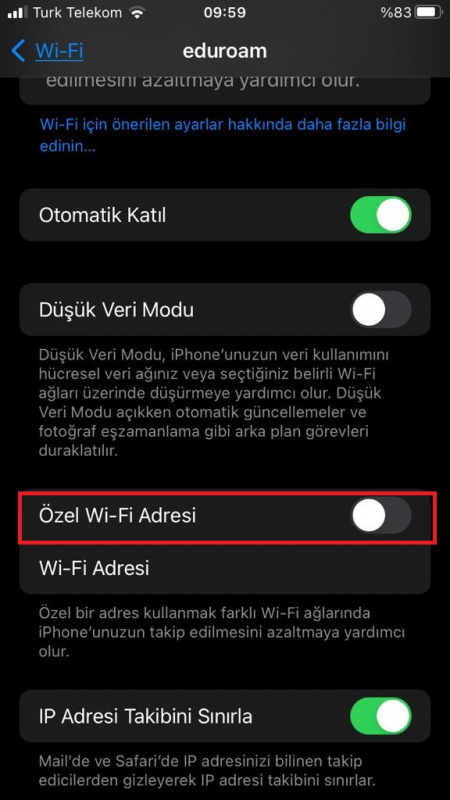
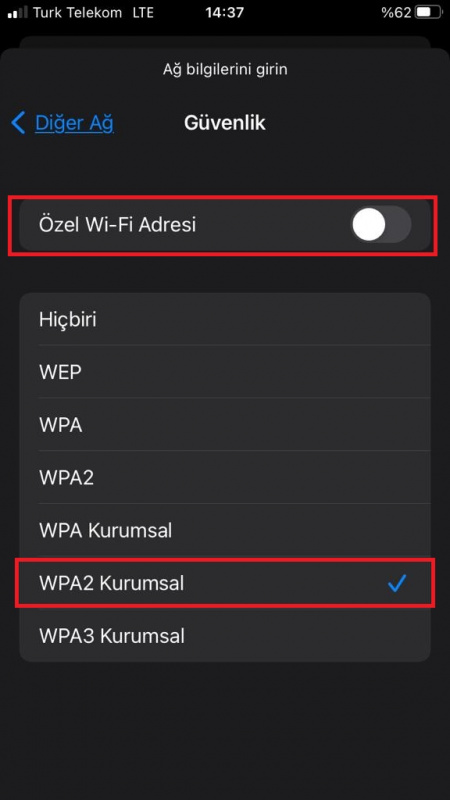
10. “Güvenlik” kısmına gelerek butona basın. (Click “Security” button.)
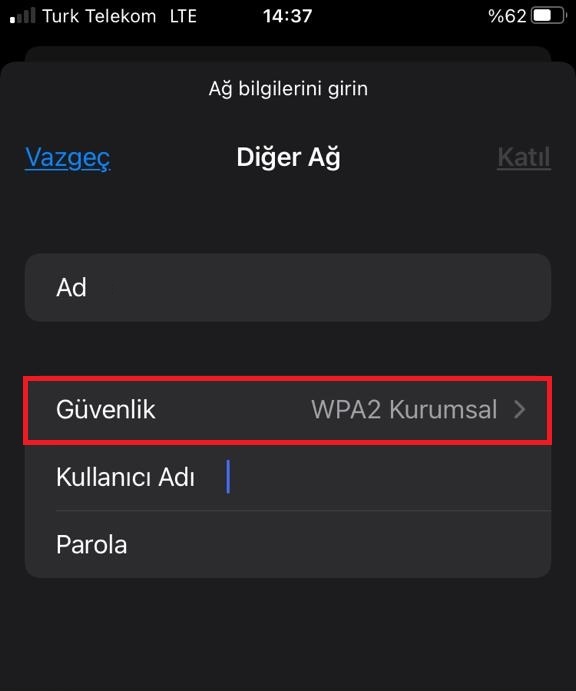
11. “Özel Wi-Fi adresi” kapatılarak, “WPA2 Kurumsal” seçilir. (Close “Special Wi-Fi address” and choose “WPA2 Enterprise”)
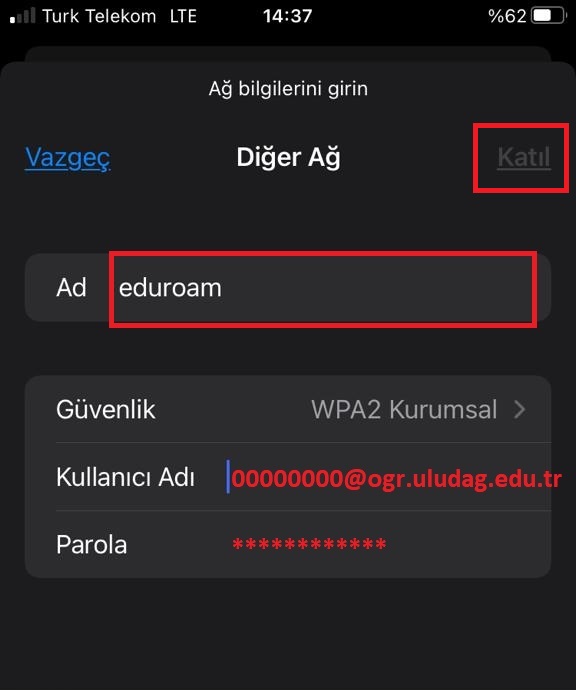
12. Yukarıdaki adımdaki seçimleri tamamladıktan sonra “Diğer Ağ” basılarak tekrar Ağ bilgilerinin girileceği ekrana geri dönün. Ad kısmına “eduroam”, Kullanıcı Adı kısmına okul e-postanızı(*******@ogr.uludag.edu.tr) ve Şifrenizi (E-posta veya Otomasyon şifresi) girin. Daha sonra “Katıl” butonuna birkaç defa basmanız gerekebilir. (After completing the selections in the step above, press “Other Network” to return to the screen where network information will be entered. Enter “eduroam” in the Name section, your school e-mail (*******@ogr.uludag.edu.tr) and Password (E-mail or Unisis password) in the User Name section. You may then need to press the “Join” button several times.)
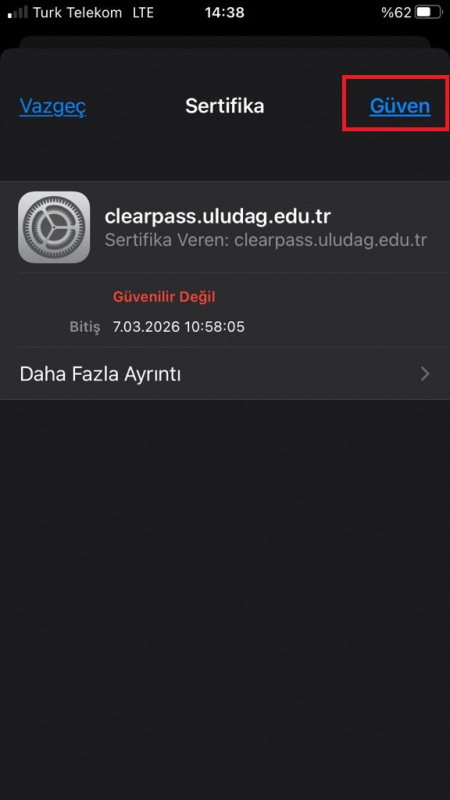
13. Eğer karşınıza böyle ekran çıkarsa “Güven” butonuna basabilirsiniz. (If you see a screen like this, you can press the “Trust” button.)
14. iOS versiyonuna bağlı olarak kullanıcı adı ve şifre isteyen ekran daha önceki adımlarda karşınıza çıktıysa “Ayarlar” sekmesinden “Wi-Fi” kısmına girin. “eduroam” ağı için “info” butonuna basın. (Depending on the iOS version, if you see the screen asking for a username and password in the previous steps, enter the "Wi-Fi" section from the "Settings" tab. Press the “info” button for the “eduroam” network.)
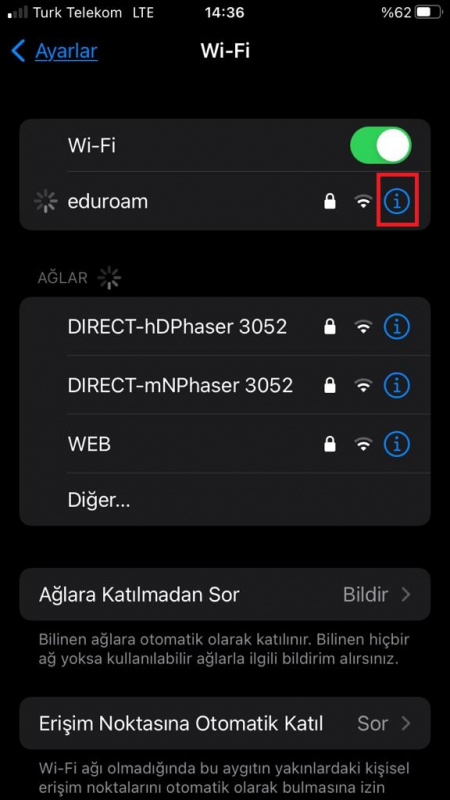
15. “Özel Wi-Fi” adresi kapatılır ve “Bu Ağa Katıl” butonuna basılır. (Close “Special Wi-Fi address” and click “Join the Network” button.)